sweet suitcase

How to make your own tuck shop style sweet suitcase

This week we have created a tutorial on how to put together this sweet ‘sweet suitcase’ for your wedding reception. We have included instructions on how to make the easiest bunting in the world EVER.

What you will need:

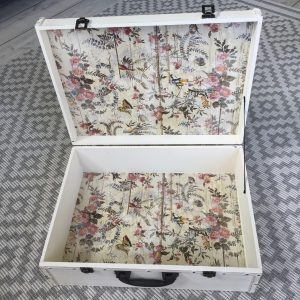
  • Suitcase – we have a selection here, or you could use a lovely vintage find.
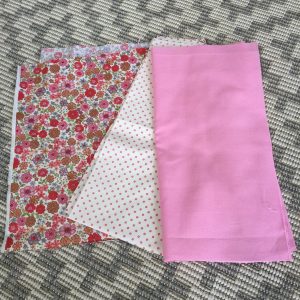
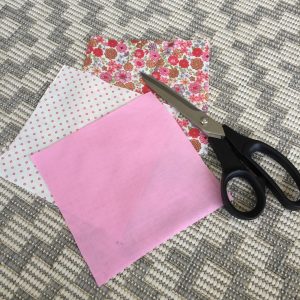
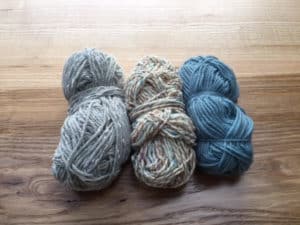
  • Fabric – charm squares work perfectly
  • Bias binding
  • Needle and thread or a sewing machine
  • Iron
  • ‘sweets’ lettering either in cotton, felt, iron on letters, or iron on vinyl.
  • A selection of dishes and jars
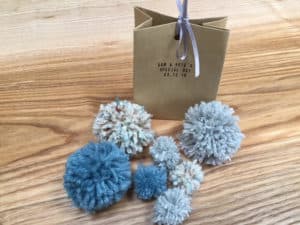
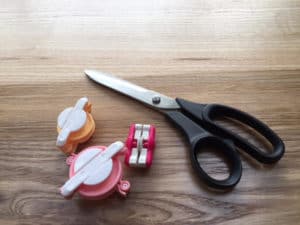
  • Sweets
  • Sweet bags, labels and tongs

How to put it all together:

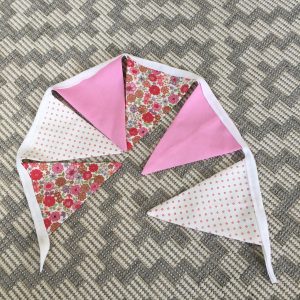
  1. Cut out 6 x squares of your chosen fabric ( approximately 15cm x 15cm)
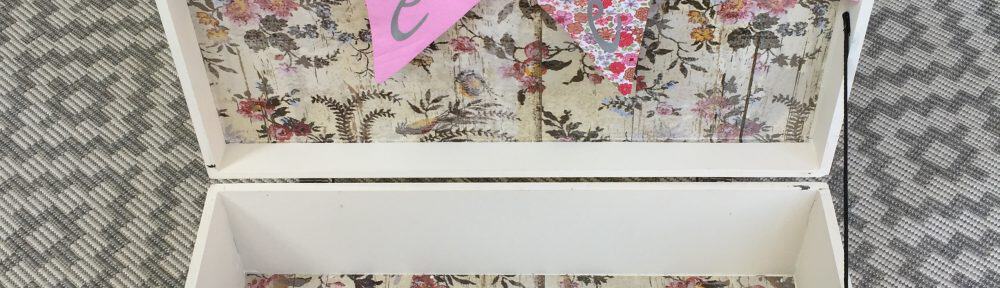
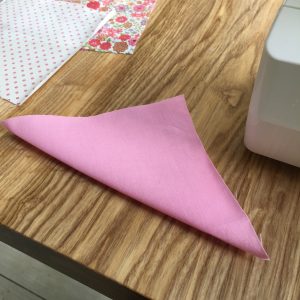
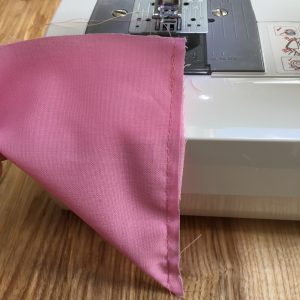
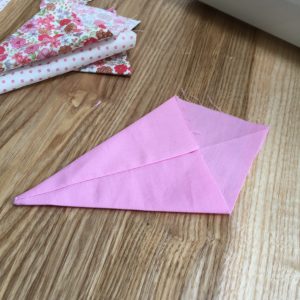
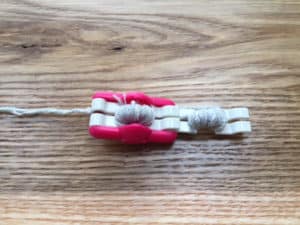
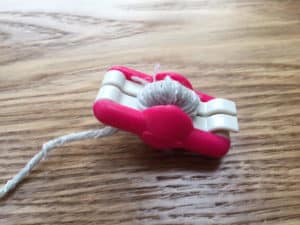
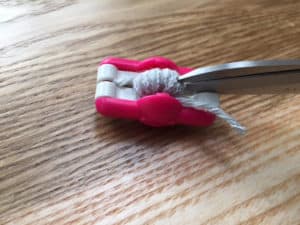
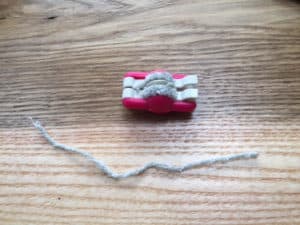
  2. Fold each square  corner to corner to create a triangle.  Machine or hand stitch along one length.  Trim corners and excess.  Repeat for all six squares.  Turn inside out and trim across the top to create a triangular bunting pendant.  See images.
  3. Measure the width of the suitcase and cut a length of bias binding 15-20 cm longer than the width of the suitcase.  Fold the bias binding in half and iron a crease along it’s length.
  4. Place or pin each bunting pendant in the fold of the bias binding and sew into position.  See images.
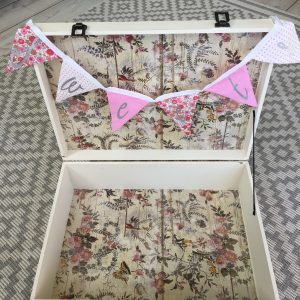
  5. Cut out and glue or iron on ‘sweets’ lettering across the pendants.
  6. Attach the finished bunting to the suitcase.
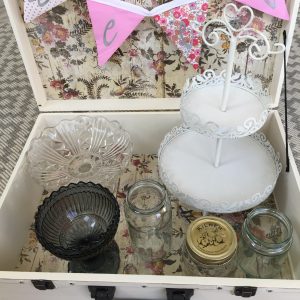
  7. Place a range of dishes, jar and stands in the suitcase.
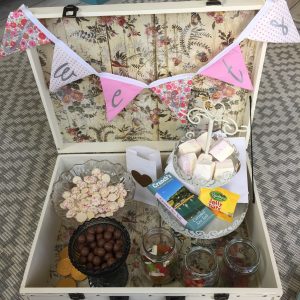
  8. Add the sweet bags, labels and tongs.
  9. Add your favourite sweets and there you go, your very own handmade sweet suitcase.

We would love to see your creations, email us with your finished cases or tweet us @lilweddingideas

Suitcase

Fabric

Cut squares fabric

Fold square before sewing

How to sew bunting

Kite shaped pendant

Bunting bias binding

Completed bunting

sweet suitcase

Suitcase with jars and dishes

sweetcomplete

cate and craig handmade wedding

Cate & Craig’s Handmade Wedding

Cate and Craig’s wedding day was picture perfect, from the couple themselves to the wonderful array of props and details which enhanced their stunning back drop.  The whole day was beautifully captured by Naomi Kenton of Rock and Rose Photography.  Cate had obviously taken pride in her handmade features and spent many hours, painting, cleaning and searching for props and creating handmade pieces. Continue reading

Sam & Primrose’s beautiful country wedding

Sam and Primrose’s beautiful day was filled with lots of personal touches and handmade features. We are thrilled to be able to share this day with you.  Primrose, the Bride, looked ethereal in her Amelie gown by Love Marley and the look complimented by her choice of blooms and children’s outfits.  The childern were dressed in crisp white cotton dresses and white shirts with blue shorts with coordinating shoes and boots.

Her sisters helped her to get ready with makeup and a bespoke floral crown and the family dogs joined the bridesmaids and page boys for the photo shoot before the ceremony!

The service was held at the local church and Primrose arrived in an old fiat complete with personalised sun strip.  Following the service, the party moved on to the reception which was signposted with hand painted signage featuring a monogram of the couple’s initials.

The venue for the wedding breakfast and party was a real blank canvas for Primrose to illustrate her creative side. The table plan and table centrepieces were influenced by the couple’s love of dogs.  This included a handmade table plan made from a pallet and table centrepieces featuring vintage dog figurines.  We were particularly taken with the tepee style venue with it’s roaring indoor fire, bunting and use of string lights. There was a homemade wedding cake, homemade marshmallow wedding favours and hand named bags for the children.  We can safely say this was one wonderful, personal handmade wedding with some unique touches.

12985594_784315630686_2490187766523822269_n 11140352_784317247446_3142475914388107919_n dogs 13015559_784316863216_4898185449550338482_n 13012756_784315316316_5274394555102246717_n 13051552_784319113706_6378621584003699971_n 12987167_784320086756_7486137793755996375_n 12993483_784322671576_4734194947309664094_n 13055343_784322342236_2307585951777360532_n 12998696_784322736446_1105184756386251342_n 13062506_784320550826_7775271643922065981_n 13000301_784321324276_8231908211969178259_n samandprim2 13000252_784322846226_4207252944081330138_n tableplan1 tableplan2 tabletheme spsign barlights fire 13006512_784323145626_4707942254065162660_n12998716_784324652606_1270885004694498834_n

Please get in touch for details of suppliers of particular products.  We hope to feature a blog on how to make a similar pallet table plan to Primrose’s in the future.

Photographer: Anna B Photography

Florist: Cherfold Flowers

Handmade creations:  dog table plan, wedding signs, marshmallow favours in boxes, tins, jars and dog figurines for table centrepieces, ‘S&P’ sign.

How to make your own unique pompom confetti

We absolutely love this addition to a wedding and an alternative to the traditional petal confetti.  We sell pompom confetti by the bag in the colour scheme your choose.  If you are feeling creative then this is a very straight forward craft to complete and a wonderfully simple way to add a handmade element to your wedding day.  If you have children, it’s also a great way to get them involved too.

Step 1: Get your tools ready.  Pompom makers in small and mini sizes and scissors.

Step 2: Choose your wool. A combination of three of four is great to compliment a specific colour theme.  A mix match of more is a great for a more fun look.  White would look great for a winter wedding.

confetti1 confetti2

Step 3: Wrap the wool around the two arches of the pompom maker as per the instructions.

confetti3 confetti4 confetti5 confetti6

Step 4: Close the arches and then cut along the bridge.  Tie the two sections together tightly with a matching piece of wool.

confetti7 confetti8confetti10 confetti11

Step 5: Repeat with different size pompom makers and different wool.

confetti12S confetti14

Step 7:  Place in a bag, cone or basket and there you go.  Beautiful handmade confetti pompoms for all of your guests.

If you haven’t got the time or the inclination you can buy them here!